
Three Instrument Recording Project


Introduction:
For my first recording project, I decided to include three instruments: vocals, keyboard, and tambourine. The song I selected is “Sittin on the Dock of the Bay” by Otis Redding. I’ve sung this song multiple times in live settings and thought it would be to actually record it in a studio.
Setting Up:
I chose to record in the blue room. My first instinct was to grab the Pinnacle Ribbon microphone that we used in class because I love the warmth and depth it adds to your vocals. I feel like it's a very versatile microphone overall – good for any style of music. I added a pop filter and foam panel to reduce any unwanted frequencies. After that I connected it to a Cloudlifter to boost the gain of the microphone.
For keys, I choose the Yamaha in the blue room. I remember using this for our “Money” recording and I really enjoyed playing it. The keys have a nice weight to them – not too light or too heavy. I chose the setting “Old Blues” because I thought it added a bit of saturation that fits the style of “Sittin on the Dock of the Bay.”
I connected the keyboard to the Fender Acoustic 100 amp. I saw this amp and thought the wooden shell on the outside was really unique and elegant. Since this amp is made for acoustic instruments, it has a more natural sound to it that pairs well with the vibe of this song, which is stripped back. I boosted the mid frequencies and chose the “hall” setting to add some reverb.
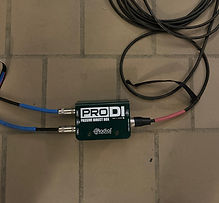
I took a quarter inch from the keyboard and took another one out of channel one of the Fender and plugged them both into the two inputs on a di box. From there, I plugged XLR from the out of the di into the snake under the desk. The vocals are channel one and the keys are channel two.
I also used the Pinnacle microphone for the tambourine and created another vocal track and titled it “tambourine” because I thought that would be the most convenient way to track it.
Gain Staging and Recording:
Track names in order: Vocals, Vocals Dup, Keys (Keyboard Fender Amp, Keyboard DI), Tambourine, and Master
First, I named all of my tracks accordingly. I created a routing folder for my two keyboard tracks. After that, I unmuted the board and gain staged all three of my instruments until I was satisfied with the output level. I made sure to add phantom power to the microphone as well.
I recorded tambourine first while listening to the actual song, so I could play keyboard and sing at the right tempo. After that, I recorded keys and then vocals last.
Post-Production:
(All Instruments: Trimming and Fades)
I trimmed the audio in the beginning to line up to where each track actually starts. I did this for each track except for tambourine, which starts immediately. I also faded in the keys in the beginning for a smoother transition. At the end of the song, I faded out each track because that’s what happens with the instrumentals in the original song. I thought that would make the most sense musically instead of ending abruptly.
(Vocals)
I created a playlist of four vocal takes that I liked. I listened to them thoroughly and chose sections from each take that I thought sounded the best. After that, I doubled the main vocals to add more body and sound more professional.
I added four plug-ins on the main and duplicated vocals: the Dyn3 Compressor/Limiter, EQ3-7 Band, Dyn3 De-Esser, and D-Verb.
I used the Dyn3 Compressor/Limiter to control the dynamics of my vocals. While this song is pretty mellow in nature, there are parts which have more volume and range – particularly the bridge. Because of this, I knew it was important to lower the threshold and attack slightly to have a more consistent sound throughout.
I used the EQ3-7 Band to roll of the high and low extremes and slightly boost the mid-high parts, which I think is the “sweet spot” of my voice. This specific plug-in is very commonly used and is always reliable in my opinion.
I used the Dyn3 De-Esser to limit sibilance because sometimes I have a tendency to over pronounce my s’s and hard consonants. So, I played around with the range and frequency of that until I was satisfied with the result.
Lastly, I included the D-Verb to add some reverb to my sound. I used the setting “hall” and “medium” for size because I thought that was a balanced mix between wet and dry.
In order to further enhance the sound quality, I used strip silence on parts of the vocals that were -54 db and under. I remember we talked about this in class and thought it was very helpful. I never even knew pro tools had it!
(Keys)
I added three plug-ins to the keys: EQ3-7 Band, BF-76, and D-Verb.
The EQ3-7 helped to roll off some of those unwanted higher frequencies. I actually liked how the lows sounded a lot so I kept them around the same level as the mids. I think using the DI really helped.
I used BF-76 to slightly minimize the attack and boost the release. I felt that this more closely mirrored the style of music, which is more acoustic-sounding.
I used the D-Verb because I wanted to add more of a “ringing,” sustained quality to the keys. I also thought this helped them to blend more seamlessly with the vocals.
(Tambo)
The first thing I did for the tambourine was add rhythmic elastic audio to be more precise.
However, doing this was very time consuming because I made the mistake of recording the tambourine without a click track. This made the rhythm inconsistent – some parts of the recording were in time while others were. This is something I hadn’t noticed while recording the other two instruments. I then added a click track after to the correct tempo and synced the tambourine to it. While it was a long process, I eventually ended up with a result that I was happy with.
I added the Dyn3 Compressor/Limiter and the EQ3 7- Band (my favorite) to the tambourine.
I used the Dyn3 to lower the threshold and the attack of the tambourine to soften the sound so it wasn’t as aggressive.
After, I used the EQ3 7. It took me a while to figure out what to do here. I wasn’t sure which frequencies to omit and which to highlight. At first, I rolled off the higher end and raised the gain of the low to mid frequencies. However, this made the tambo sound too hollow. Instead, I then increased the sound of the higher frequencies which brought out a sweeter, more natural “ring” of the instrument.
Reflection
Overall, I thought this was a very enjoyable experience. I’m glad that I started off with the three instrument project and sort of “ripped the bandaid off” by getting one of the harder ones done. There were a couple hiccups along the way though. Corey (who's also my roommate) definitely helped out a lot and is always happy to. I think with each project, I’ll continue to get more comfortable and have better instincts of what to do.


